
I recently returned from a trip to South Texas and while there I visited one of my old hotspots–Llano Grande State Park (i.e., Big Plains State Park). I have a love-dislike relationship with this park. On the positive side, it’s a great place to see and photograph many different bird species. In addition, if one is lucky, alligators or bobcats may be seen. I’ve had luck in the past with the alligators but the bobcat continue to elude me. What I dislike about the park is the large number of joggers, bikers, and portrait photographers that always seem to make their presence when the action is good, which inevitably scares the birds away. On more than one occasion, I’ve been photographing birds in beautiful light only to be interrupted by a portrait photographer attempting to take homecoming or quinceanera (15th birthday) photos. In case you are starting to wonder about that rant, yes it is a state park and they have just as much right to enjoy it as a bird watcher or photographer; BUT, a little common courtesy seems to be in order here. It’s a 230 acre wetland park so if someone is already photographing birds where you desire to take portraits…respect the photographer already there and find another place for the portraits…just don’t setup in the same location and start shooting.
OK, that’s off my chest. Lets get to the images in this post. The Vermillion Flycatcher’s winter range includes the Rio Grande Valley (South Texas). For the past 3 years I have seen this bird flying from perch to perch near the big pond behind Llano Grande’s park headquarters. Unfortunately, the perches within photographic distance near this area are man made; but hey, sometimes it’s good to photograph wildlife that shows the hand of man. I’d prefer a natural perch, but when photographing at a state park, one rarely has control of his or her shooting conditions.
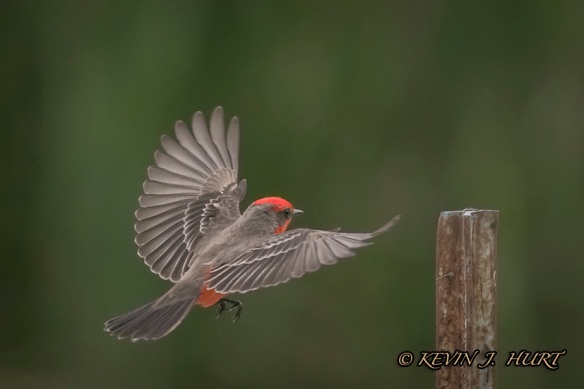
Vermillion Flycatcher | Canon 7D MkII | ef 500/4.5 | ISO 6400 | White Balance: Cloudy
On this particular day, the light was terrible, i.e. it was dull, overcast, and gray. In order to achieve a high enough shutter speed to freeze the wings in these light conditions, I would need to bump the ISO on my camera to 6400 and even then, the shutter speeds were not as high as I would desire. I had observed this vermillion flycatcher frequently visiting this perch as it fed on insects. So, as it made it’s rounds to a different perch I setup my shooting position on this post and then waited. It was a short wait. From this post, the vermillion flycatcher would take off, attempt to catch an insect (often successfully), then fly back and repeat the sequence. Understanding this behavioral pattern, I prefocused on the perch and upon the vermillion’s return, I depressed the shutter and let the 7D MkII capture its 8 frames per second. I liked the two shared here.
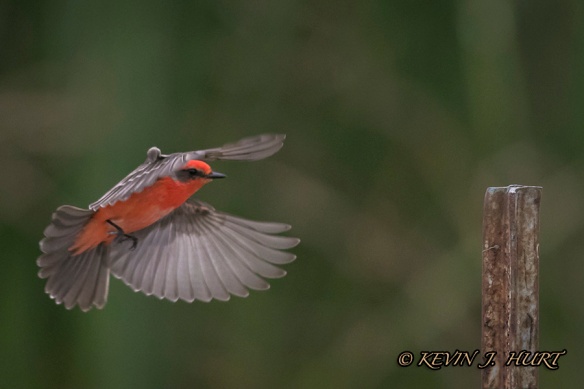
Vermillion Flycatcher | Canon 7D MkII | ef 500/4.5 | ISO 6400 | White Balance: Cloudy
I hope to capture this bird in better light next year but for now, I’ll have to be content with these two. Until next time, good light and keep shooting. –KEVIN
For information on the equipment used to capture these images, please click on the gear recommendations tab.


